Every bike is different, but the essential tasks and order in which you have to do them for your average suspension mod is pretty universal
Here’s a few step by step overviews to get you started.
Front Forks
- Support the bike safely and securely on a jack and ensure the rear end doesn’t move around.
- Remove any reflectors from the forks.
- Remove the calipers and suspend them from the frame. Don’t leave them to hang freely, as this can cause internal damage to the hoses.
- Remove the front mudguard.
- Note the distance between the top of the upper triple tree and the top of the fork tubes You will need this when you reinstall the fork tubes.
- Loosen all clamps and also loosen the top bolt of the tube before removing it (easier to do while the forks are still on the bike).
- Gently slide out the tubes.
- Remove pre-load adjuster and then remove the cap.
- Remove the spacer, washer and spring from inside the fork (watch out for the oil).
- Drain the oil and pump the forks to ensure all the oil is out or leave the forks to drain.
If you’re just changing out the springs or fork oil, simply add the new springs and/or fresh oil and reassemble in reverse order.
If you’re heading deeper into the forks, say to replace the damping rod, you also need to remove the bolt at the very bottom of the lower fork leg to access the rod. Once that’s done, you can remove the damping rod and replace/upgrade the components of your choice and reassemble.
Rear Twin Shock
- Support the bike safely and securely on a jack and ensure the front end doesn’t move around.
- Loosen the four shock mount bolts (two per side).
- Adjust the height of the jack to find the sweet spot (this is the point where the suspension is not under load, and the mounts will easily slip off).
- Remove the lower mount first to stop the upper mount flapping about.
- Install new shocks and reassemble.
Rear Single Shock
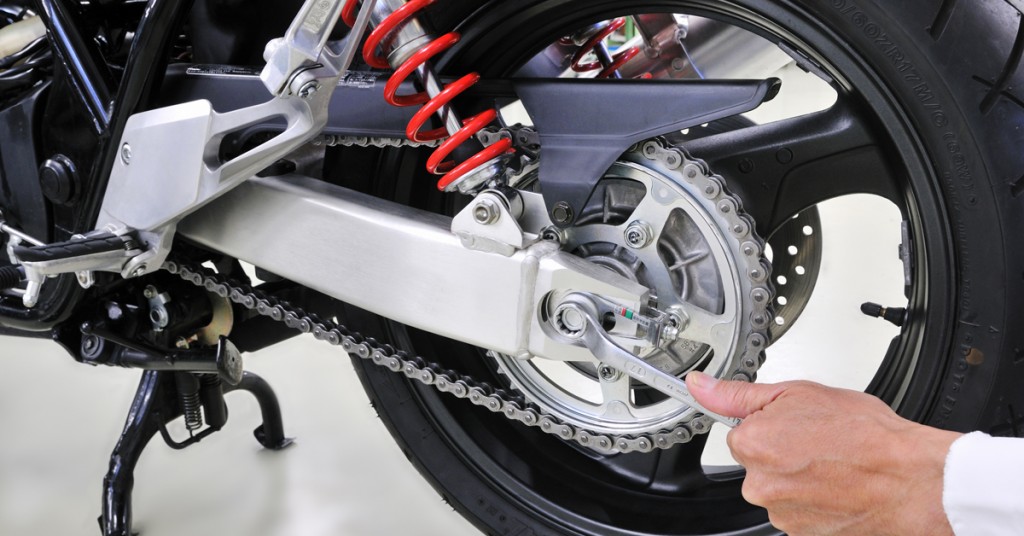
- Support the bike safely and securely on a jack and ensure the front end doesn’t move around.
- Raise and remove the rear wheel.
- Loosen the shock-attachment bolts.
- Adjust the jack height and swingarm height to help maneuver old shock free (Depending on which bike you have, this can either go real easy or real hard. Getting at the shock may also require the removal of muffler bolts and clamps to get at all of the attachment mounts and fittings).
- Install replacement shock and reassemble in reverse order.
Steering Dampers
If your bike already has a steering damper, then your aftermarket replacement should bolt straight on and can be installed fairly quickly, using basic hand tools. Be aware that there may be some precise measuring involved to ensure that the new damper is set up just right.
Many other steering dampers are universal by design and attach to the steering head. Again, installation should be fairly simple as long as you properly follow the instructions that come with the part.
Lowering Links
Lowering links can either contain single or multiple setting adjustments.
- Ensure your motorcycle bike is stable and secure on a jack.
- Make sure the front end is secure and that the rear wheel is at that sweet spot between being off the ground and just touching. At the sweet spot, there is minimal load on the suspension. Loosening and removing bolts and fittings will be easiest.
- Remove fairing and belly pan if required to access suspension linkage.
- Locate, loosen and remove the bolts to the OEM suspension linkage. If clearance is an issue in removing bolts, try to remove the sleeves that are installed in many mounts, this will give you more play to get at removing the bolts.
- Install lowering link, making sure that the adjustable end is at the bottom.
- Reinstall sleeves and install upper bolt loosely.
- Now you can play with the jack height to lower the bike and line up the mounting hole with the lowering holes on the new link.
- If you find that the jack gets caught up on something low such as the muffler, and doesn’t allow you to line up with the lower options, raise the jack up and put a block of wood such as 2x4 beneath the back wheel. This will give you the added height you need to lower the jack further and check out the lowest linkage settings.
- Once you’ve chosen the height you like, line up and install the lower bolt and tighten everything down.
- Remember, if you lower the rear suspension, you should lower the front by the same amount to keep the steering geometry set up right.


