


Connecting Your Gear
If you’ve purchased heated clothing that’s designed to draw power directly from the bike, then you’ll need the correct accessories to hook everything up and make that connection. For example, if you’ve bought a Firstgear jacket or pant liner, you need the battery harness (connectors) and controller that hooks the jacket to the bike.
Manufacturers will allow for connection of the clothing directly to the power source (battery) of the bike, using a simple on/off switch. To be honest, this way is not recommended for two reasons: First, if the heated clothing is switched on, it will only be switched on in full-power mode. This may be okay for short trips, but burns can actually result from some heated clothing if left on full power all the time.
And second, full power heating mode is going to draw a lot of power from your ride’s battery. With a decent controller, you can adjust the amount of heat you get on the fly, which will make you feel more comfortable and save your ride’s battery, too.
When buying controllers (they’re often described as trollers), it’s a good idea to purchase the same brand as the clothing you’ve bought. For example, buy a Gerbing heat controller for Gerbing clothing and a Firstgear trollers for Firstgear products.
Trollers are pretty standard in configuration and will fit across multiple brands, but it just makes sense to try and keep things consistent. If you are trying to connect multiple products from a variety of manufacturers, then you’ll need to do your research to see what works.
Once you’ve purchased the requisite cables and troller, hooking it all up is as simple as 1, 2, 3:
- Connect the battery harness directly to your bike’s battery. Make sure you connect the cables to the correct terminals. In other words, the negative lead hooks to the negative terminal on the battery and the positive lead goes to the positive terminal.
- Connect the other end of the battery harness cable to the troller.
- Connect the troller to the heated clothing, switch on and adjust the heat as required while you ride.
Single and Dual Zone Trollers
Trollers come in single or dual configurations. A single troller will obviously heat just one item of heated gear. A dual troller, however, can heat two or more items.
Example 1: Connect a jacket and gloves to a dual troller, and you can adjust the heat of each item independently.
Example 2: Connect a jacket to one control and pant liner, socks and gloves to the other control, and you can have your jacket at one microclimate and your pant liner, socks and gloves at another.
Riding With a Passenger
If you ride with a passenger, then there has to be one troller (either single or dual) for you and another one for the passenger. Additional trollers attach to your bike in the same way…simply attach the battery harness connections directly on top of the existing troller connections, join everything else up and you're good to go.
Troller Pouch
Obviously when everything is all connected up, you may have a fair bit of cable running around and a loose troller to contend with. Taking the time to cable tie loose wiring to the frame will tidy things up a lot. Just be careful to ensure that the tied cable isn’t placed somewhere where it will rub against a sharp or pointy surface. As for the troller, you can purchase pouches for them from Firstgear that can connect to a belt or tank bag. If you connect it to your belt, remember to disconnect it from the bike cable every time you get off the bike (bet you forget at first). :-)

Portable Battery and Belt
Want to use the 12V battery option, but don’t want to use your bike’s battery? No problem, you can actually buy a 12V portable battery that comes complete with a belt and charger.
12V Auxiliary Power Outlet
Plenty of modern machines (bikes, ATVs and snowmobiles alike) come equipped with 12V auxiliary power outlets. If you don’t want to connect your heated gear directly to the battery, you can go this route by buying an adaptor, like the Gerbing 12V DC plug adaptor. Remember, though, by using this outlet for your heated gear, you’re taking it away from potentially powering another piece of equipment such as a GPS for example.
Panel Port
Another connection option is to install a dedicated heated gear panel port to your bike. Rather than a universal port (like a cigarette lighter type) this is a dedicated heated gear port and you’ll find that all the heated gear manufacturers make them. You will need to drill a hole somewhere around the gauges or on the fairing to install this small port, so think carefully about where you place it. Check out any forums that are dedicated to your model of motorcycle and see what other riders have chosen to do.
Want more than heated togs? Check out a few other heated accessory ideas that may float your boat.
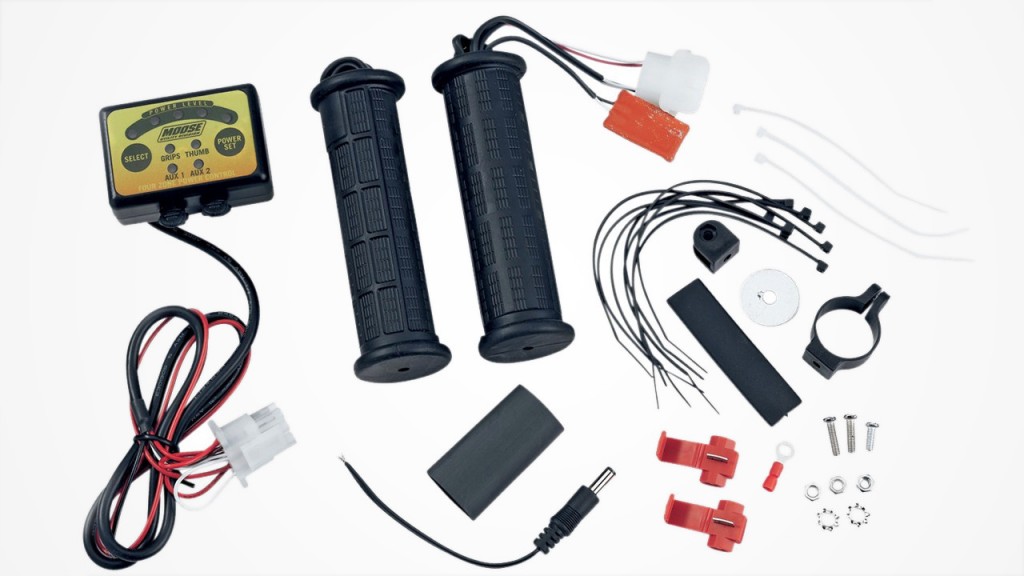
Heated Grips
Oxford (from the UK) have been making awesome heated grips for years. They come in a variety of styles, matched to different riding genres, are easy to install and are reliable. But there are other manufacturers, too. Heated grips certainly will help in chillier weather, but remember only the bottom of your hand and fingers will feel the benefit. If you’re going to go real hardcore this fall and winter, then you may need more than heated grips to keep that wind chill away from freezing your hands.
Heated Overgrips
Heated overgrips follow the same principle as heated grips, except you don’t need to remove your existing grips to install them. Over grips simply wrap around your existing grips. A super quick and convenient install that’s perfect for short commutes or occasional quick winter rides. We like this pair from Oxford.

Heated Seats
And you thought heated seats were only for cars and trucks. Saddlemen and Mustang rule the aftermarket heated seat world with a variety of seats that offer comfort and warmth to those precious cheeks. Connection is usually direct to the battery, always easy and the accompanying trollers offer plenty of adjustment to ensure things don’t get either too hot to handle or cold comfort. You can even get heated backrests!